How to Use "Summary" Page

Hi Trader, my name is Nikita, and I'm gonna show you all the features of our analytical engine.
🧐 I've already told you how to use "My Trades" page. And today we study "Summary" page:
For those who are too lazy to read, we've got Video instruction 😎
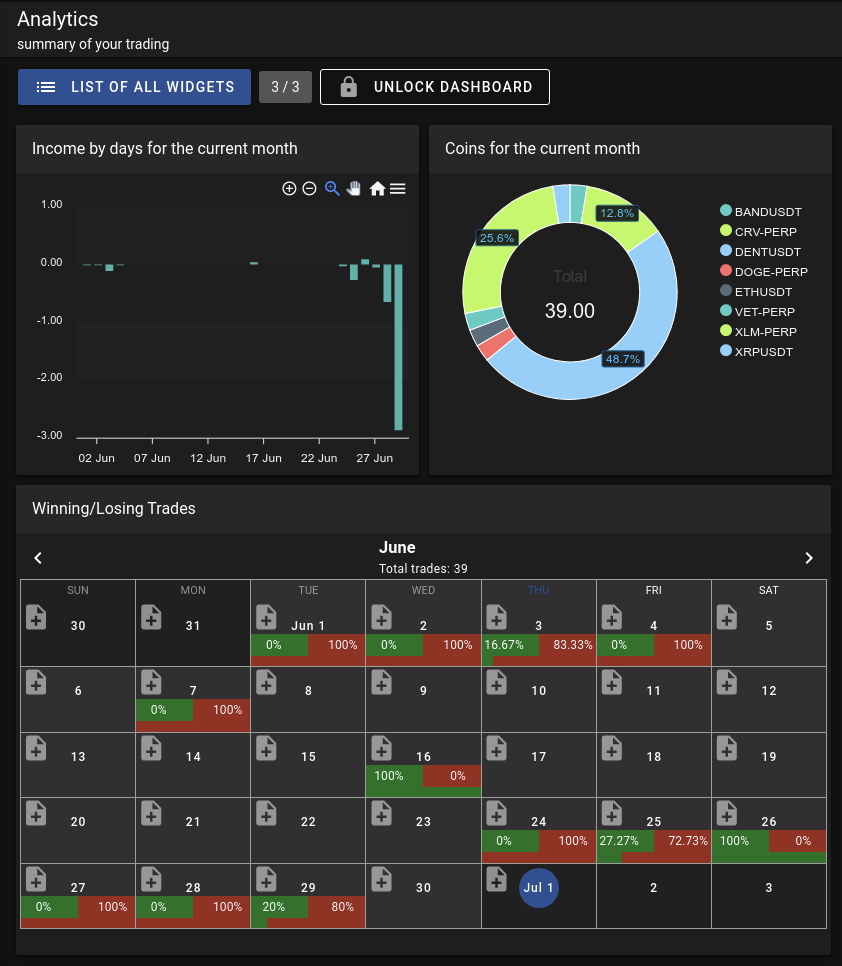
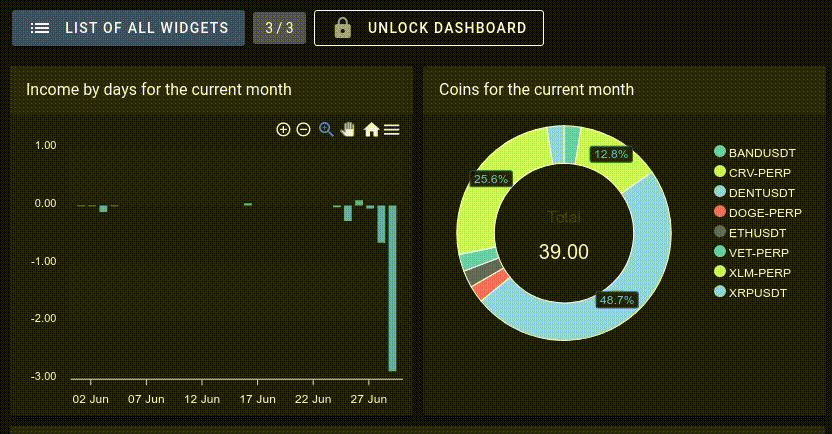
By default, we have selected 3 analytic widgets for you:
- Income by days.
- Coins for the current month.
- And the calendar with the percentage of successful and losing trades.
But you are not limited to this set and can change widgets at any time and as many times as you like. There is still one limitation. This is the maximum number of widgets aboard.
- For the "Beginner" level, a maximum of 3 widgets at a time.
- For the "Trader" level, a maximum of 10 widgets.
- And for the level "Trader PRO" there is no such limitation (😆 how long your computer can withstand).
How many widgets you have and what is the maximum, shown to the right of the "List of all widgets" button.

Changing the board
To resize the widget, move it or delete it, you just need to unlock the board as it's shown on the video below 👇🏻
Adding a widget
After you have removed a widget, and you have a free slot, you can add a new one by clicking on "List of all widgets". You will be presented with a large list of all currently available widgets.
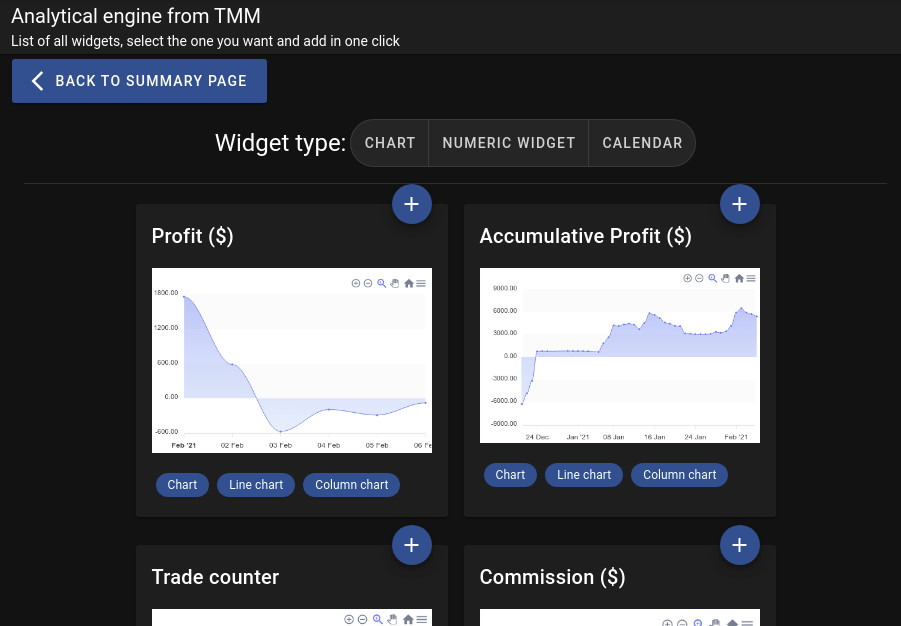
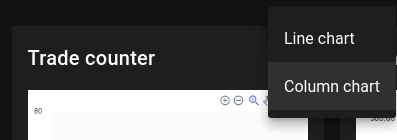
To add a widget, click on the "plus" sign and if the widget has different types of display, a window with a choice will pop up. Let's add a "Trade counter" and select the "Column chart" in the pop-up window.
If the widget has been successfully added, you will see a notification at the bottom right. You can return to the "Summary" page.
Widget customization
After adding the widget, we can customize it. Let's take a look at the available buttons. To make them all available, unlock the board again and move the mouse over the widget.

- ✏️ "Pencil" - will open the widget settings.
- 📑 "Copy" - will copy this widget and paste it on the board with all the settings.
- 🔓 "Lock" - will lock the position of the widget on the board. Other widgets will not be able to move it.
- 🗑 "Trash bin" - will remove the widget from the board.
Configuring widget data
By clicking on ✏️ "The pencil", you will see a window with filters.
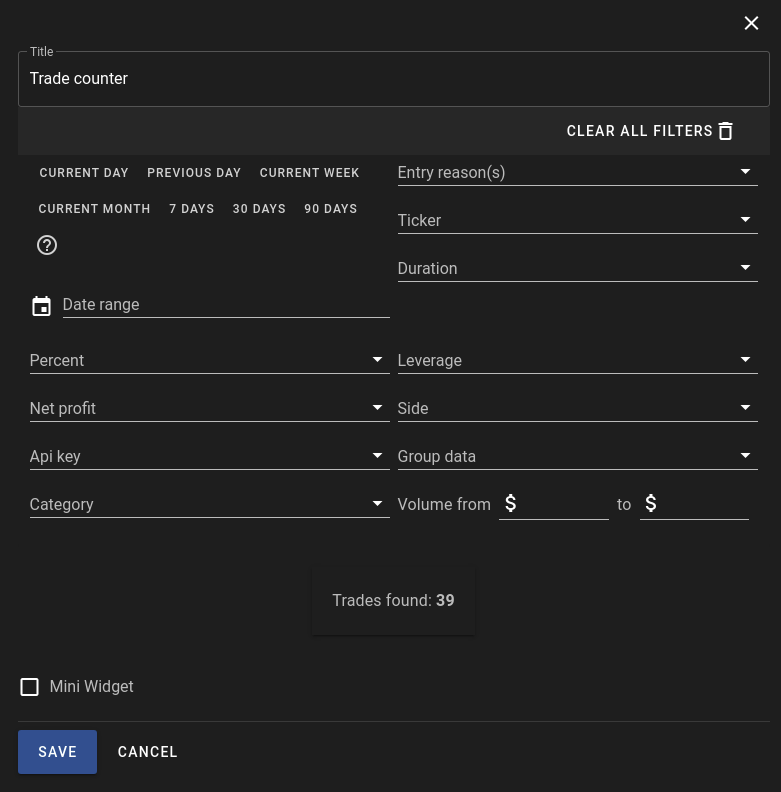
Here you will see the filters you are already familiar with (the same filters are available on the "My trades" page with a slight difference).
You can change the name of the widget. Make it "Mini", in this case it will take up as little space as possible and allow you to place more widgets on one screen.
A special filter "Group data" allows you to get a graph not by day (*default value), but, for example, by month or by minute. It depends on what kind of detail you need.
This is how you can customize the data and compare. Make two widgets with a profit, one only long deal, the other just short and compare. ❗️ The analysis possibilities are almost endless.
Video instruction 👇🏻
Conclusion
These were the basics of using the "Summary" page. If you still have questions, you can always ask them in our Telegram chat or write to us at [email protected]